| |
|
|||||||||||||||||||||||||||||
|
Diagnostic Part 3: Printhead Problems
If part 2 revealed a Printhead problem, then the purpose of part 3 is to identify exactly which Printhead is faulty. Each rectangle in this part is identified with the number of the Printhead that produced it.
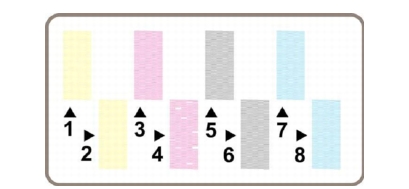
If ALL the Printheads are printing perfectly, part 3 of the Diagnostic print will look like this:
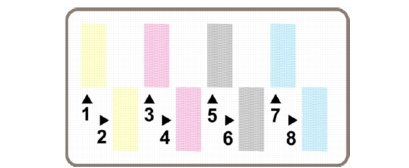
The following example shows an imperfect Printhead (number 4) that is still suitable for printing. It is not damaged enough to warrant a replacement because the Printer can compensate for a number of faulty nozzles.
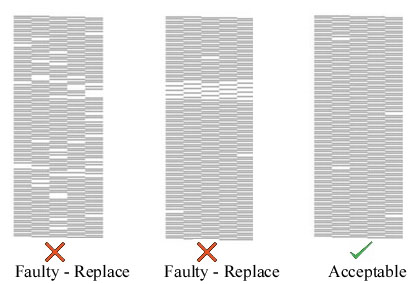
 Analyzing Printhead Nozzles
Do not expect perfection, because even if there are only a few missing lines, the Printer can compensate for this so there is no need to replace the Printhead. Up close, the rectangle printed by a faulty Printhead in part 3 of the Diagnostic Print may look like some of these examples.
 Troubleshooting a Faulty Printhead
1. If part 3 of the Diagnostic Print shows a problem with one Printhead, but part 2 of the Diagnostic Print shows no problem, then:
2. If both parts 2 and 3 of the Diagnostic Print show a problem, then:
|
|||||||||||||||||||||||||||||
|
||||||||||||||||||||||||||||||