The purpose of this Service Calibration is to calibrate the nominal
advance of the media. This calibration is necessary to control the
exact movement of the media in order to avoid print quality problems
like banding. The values from the Calibration will then be stored
in the EEROM and the user can restore the Printer to these values
by selecting "Restore factory" in the Advance Calibration
menu.
Perform the Factory Advance Calibration whenever:
Banding is detected in prints for all HP Media
standard paper types and Printheads Diagnostic is OK.
Drive Roller is disassembled or replaced.
Paper-Axis Motor Assembly is disassembled or replaced.
Electronics Module AND the Ink Supply Station are replaced.
Perform the Factory Advance Calibration as follows:
NOTE: Make sure you load HP High Gloss Photo Paper or HP
Bright White Inkjet Paper in to the Printer before performing this
calibration. Do NOT use any other type of media apart from HP High
Gloss Photo Paper or HP Bright White Inkjet Paper otherwise the
Printer will display "Calibration Error" on the Front
Panel and the calibration will be cancelled.
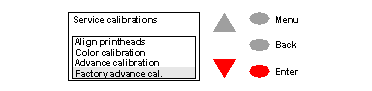
1. In the Service Calibrations submenu, scroll to "Factory
advance cal." and press Enter.
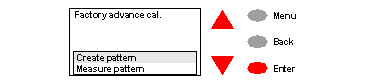
2. When the following message appears on the front panel, select
"Create pattern" and press Enter.
3. If media is not loaded, the following message appears on the
front panel and you must load media into the Printer.
NOTE: Do NOT use any other type of media apart from HP
High Gloss Photo Paper or HP Bright White Inkjet Paper.
4. The Printer will start to print the Accuracy Calibration Pattern
and the following message will be displayed on the front panel:
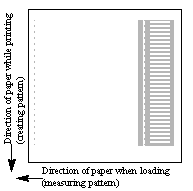
5. The following drawing shows you the pattern that will be printed:
6. In order to measure the pattern that has been
printed, load the pattern into the Printer with the printed side
up and with the dotted line at the top (that is, rotated 90º).
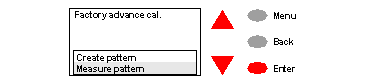
7. Re-enter the Advance Calibration and select "Measure
pattern" and press Enter.
8. The Printer will measure the alignment marks using the line
sensor on the Carriage Assembly. The following message will be displayed
while the Printer measures the pattern:
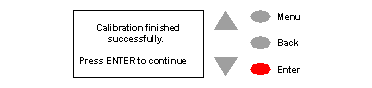
9. Once the calibration is completed, the following message will
be displayed: