you are here: welcome  tell me about...   previewing and the paper frameSkip site-wide navigation link group

external link to hewlett-packard home external link to hewlett-packard products and services external link to hewlett-packard support external link to hewlett-packard how to buy
spacerhp logo - inventspacer
hp designjet 815mfp
how do I...?
the problem is...
tell me about...
alphabetical index
hp designjet online
spacerfollow this link to top of page

End of site-wide navigation link group

tell me about previewing and the paper frame

previewing...

Creating a preview is not absolutely necessary. If you know your settings work well with the current original, then you can skip previewing. The Preview button can be pressed at any time, and always creates a fresh preview of the whole image while using the currently active settings. This means that you can visually control new settings online before pressing the Copy button and sending output to the printer.

With a preview of the copy loaded in the scanner software, you can adjust your primary image settings (Type of Original template parameters) while viewing the "before and after" effects of your changes through a split screen.

the paper frame...

paper frame round image

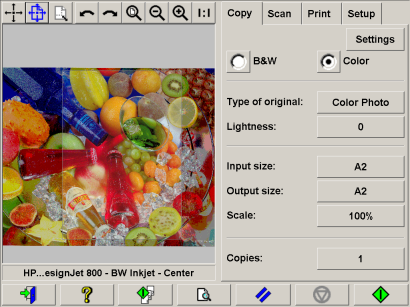
The paper frame defines the area of the image that will be copied. Its size is determined by the size settings made in the Copy Tab dialog. Your scanner software let you position the paper frame directly in the preview and thus visually set your copy area.The paper frame in the preview window fulfills two functions:

  1. It frames the area in the original that will be copied
  1. It shows how the Margins will crop the image in the end result.

Before you can see and use the frame, you have to have a preview of the copy loaded through the Copy Preview button. The paper frame's size and thickness in the preview window will be determined by the Input Size, Output Size and Margins settings.

The paper frame gives a complete "What You See Is What You Get" (WYSIWYG) impression of your copy.

output modified by paper frame

The frame's visual outer boundaries are determined by the Input size setting. The area inside the frame shows what will be copied.

The frame's thickness visualizes the margins in relation to the copy's size and shows how they crop the image. With margins at the value of zero, a thin frame will still be displayed to show the capture area.

printing icon printing instructions printing instructions legal information legal information