|
 
|
|
|
|
|
hp designjet 815mfp |
|
|
|
|
|
|
|
|
|
|
|
|
|
|
|
|
|
|
|
|
|
|
|
 |
|
|
|
how do I define scanner setup options?
|
|
|
Select a topic...
...to access the scanner setup
options...
...paper load
...media offset
...extended thickness
settings
|
|
|
|
|
to access the scanner setup options... |
|
|
|
|
- Press the Setup tab.
|
|
- Press the Scan Options button.

- Press the Scanner Setup button.
|
|
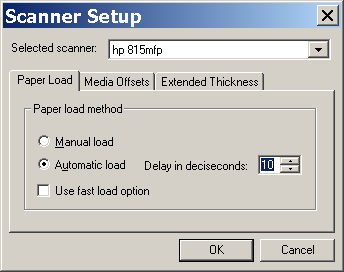
- Select between Manual load or Automatic load.
- Set the delay factor for automatic paper loading to give you
time to position the original correctly.
See:
...Tell me about Paper
loading
|
|
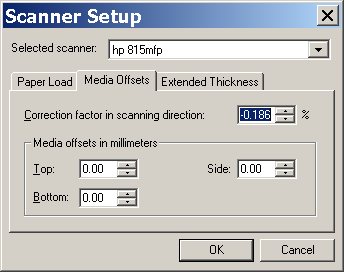
- To get very high accuracy, modify the vertical precision from
zero to a value between -1% and 1%.
Positive settings mean that the distance between scan lines will
be increased, and negative settings mean that the distance between scan lines will be
decreased.
When you exit the Scanner Setup dialog, the modified value is stored
in non-volatile memory in the scanner and can only be changed by re-doing the setup.
See:
...Tell me about Correction
Factor in scanning
|
|
|
|
|
|
extended thickness settings |
|
|
|
|
|
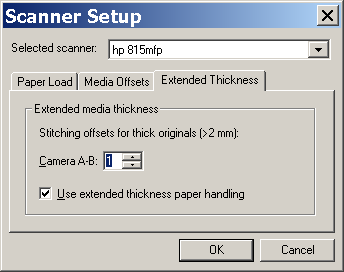
Normally, only stiff media will affect stitching. A flexible
media will usually be stitched correctly regardless of its thickness.
- If the lines seem uneven, check the box labeled Adjust for
extended media thickness.
- Change the value for each of the scanner's cameras. Normally,
only positive values should be used.
- Make test scans and readjust the values until you are
satisfied that the lines are stitched correctly.
- Click OK to accept your settings.
See:
...Tell me about Extended
thickness settings
|
|
|
 how do I...?