|
 
|
|
|
|
|
hp designjet scanner 4200 |
|
|
|
|
|
|
|
|
|
|
|
|
|
|
|
|
|
|
|
|
|
|
|
 |
|
|
|
how do I... maintenance procedures
|
|
|
Maintenance procedures should all be performed in a single maintenance
session, starting with Cleaning the scan area and
ending with Camera alignment and calibration.
The scanner maintenance procedure should be performed once per month.
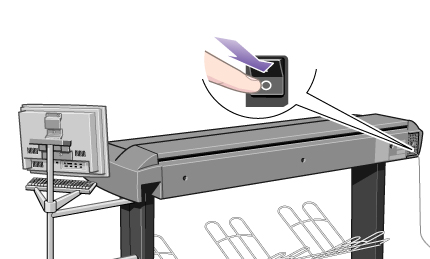
- Turn the scanner power off.
|
|
|
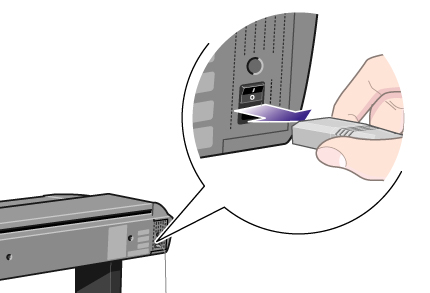
- Disconnect the scanner power cable.
|
|
|
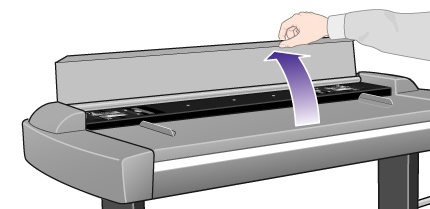
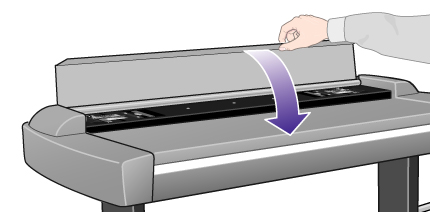
- Open the scanner cover.
Place your fingers just inside the insertion slot and flip the
cover upwards to expose the scan area.
|
|
|
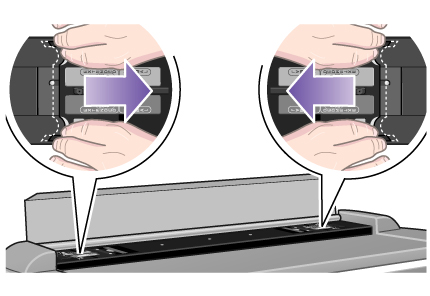
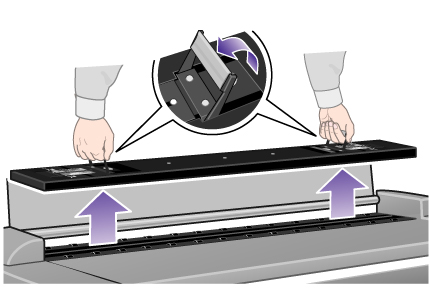
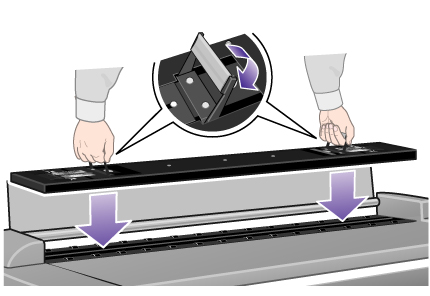
- Remove the pressure platen.
Press down on the platen as you pull the left and right sliders
towards the scanner's center until the metal safety buttons on each side of the scanner, pop
up.
|
|
|
- Use the two handles to lift out the pressure platen as soon as
you feel the sliders disengage.
|
|
|
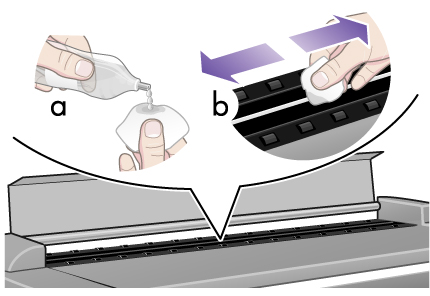
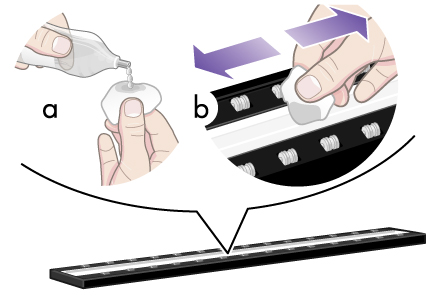
- Gently wipe the glass plate.
Caution: do not use abrasives, acetone, benzene or fluids that contain
these chemicals. Do not spray liquids directly onto the scanner glass plate or anywhere else
in the scanner.
- Clean the glass with a lint-free cloth and a mild,
streak-free, glass cleaner.
|
|
|
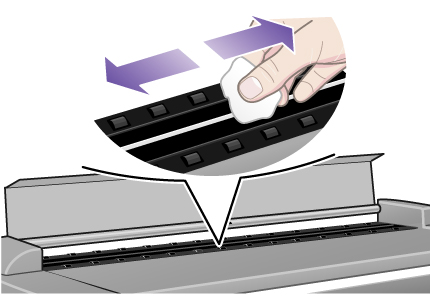
- Dry the glass completely using a separate clean, dry
lint-free cloth like the one provided with the maintenance kit.
|
|
|
|
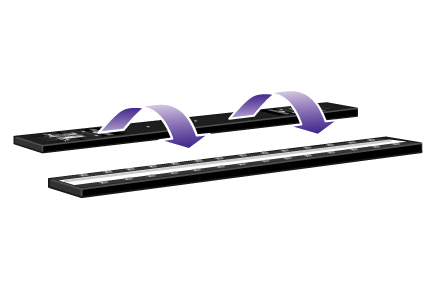
The white scanning area background platen is on the backside of the
pressure platen you removed.
- Turn the pressure platen, that was removed in step 4, upside
down.
|
|
|
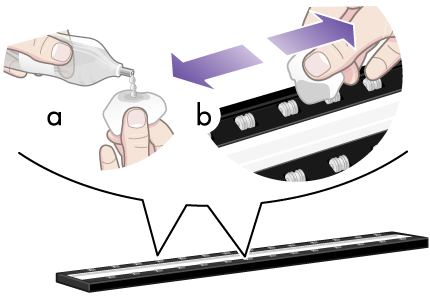
- Clean the white platen.
Caution: do not use abrasives, acetone, benzene or fluids that contain
these chemicals.
- Wipe the white metal area with a lint-free cloth and a
mild, streak-free, glass cleaner.
|
|
|
- Clean the platen rollers.
Caution: do not use abrasives, acetone, benzene or fluids that contain
these chemicals.
- Wipe the rollers with a lint-free cloth and a mild,
streak-free, glass cleaner.
|
|
|
- Dry the platen and rollers completely using a separate clean,
dry lint-free cloth.
|
|

|
- Replace the pressure platen.
- Lift the pressure platen into its original position.
- Press down on the metal safety buttons to let the two
sliders move back and lock the platen into place.
|
|
|
- Close the scanner cover.
|
|
|
|
Now continue with the Camera
alignment and calibration procedure.
|
|
|
|
|
|
camera alignment and calibration |
|
|
|
|
|
Before you align and calibrate the cameras, make sure that you have gone
through the first process in scanner maintenance: cleaning the scan area. An unclean
scanning area will give you imprecise calibration results.
Camera alignment and calibration is a fully automatic process that you
only need to activate through the wizard and then leave to run on its own.
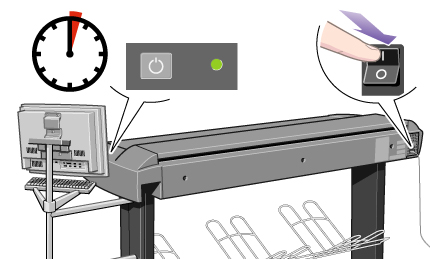
- Connect the scanner power cable.
|
|
|
- Power ON the scanner.
The scanner should be warm. Make sure that the scanner has been
turned on for at least one hour prior to camera alignment and calibration. Slight light
intensity changes and camera shifting can occur just after turning the scanner on and the
warm-up time will ensure that light conditions and camera heights have stabilized.
|
|
|
- Select the Setup tab.
|

|
- Press the Scan Options button.
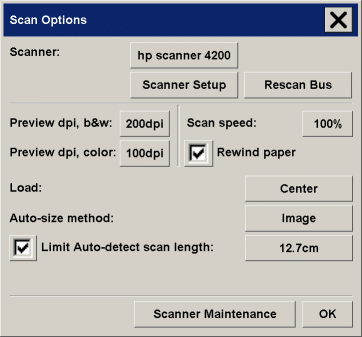
- Press the Scanner Maintenance button to start
the Scanner Maintenance wizard.
The maintenance wizard will guide you step by step through the
whole maintenance process: Camera Alignment, Stitching, and Calibration.
|
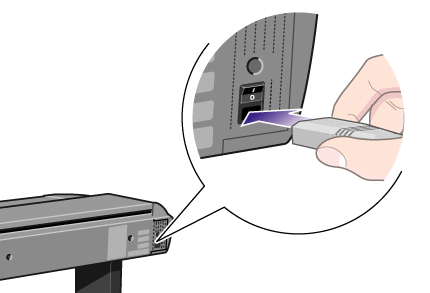
- Insert the Maintenance Sheet that came with your system.
|

|
|
The wizard will ask you to insert the Maintenance Sheet that came
with your scanner. The sheet's printed side must be inserted face down. Align the midpoint
arrow with the scanner's midpoint arrow and feed the sheet into the scanner.
- When maintenance is completed, remove the Maintenance Sheet
from the scanner and return it to its protective cover and then place it in the storage
folder. Store the folder in a dry place and out of direct light.
|
See also:
...tell me about scanner
maintenance
|
|
 how do I...?