|
|
|
||||||||||||||||||||||||||||||
|
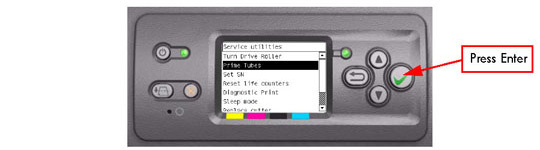
Prime Tubes
The purpose of this Service Utility is to Prime the Tubes when the Ink Tubes are NOT new and they need to be re-primed or automatic priming was not completed correctly.
Make sure that NEW Ink Cartridges are installed or that the ink volume remaining in the Ink cartridges is below 88% before starting to prime the tubes. If you do not comply, you will get a warning message.
Perform the Prime Tubes utility as follows:
1. In the Service Utilities submenu, scroll to "Prime Tubes" and press Enter.
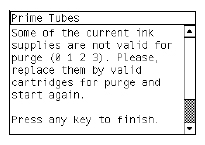
2. If the Ink Cartridges are not suitable for priming, the following message will
appear on the Front Panel. Replace the installed Ink Cartridges with Ink
Cartridges that are new or contain less than 88% of ink. Press any key to
finish the utility.
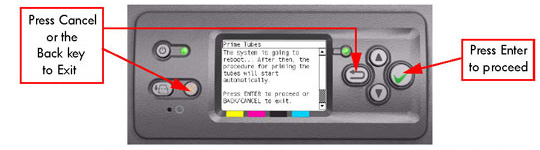
 3. When the following message appears on the front panel, you must select
whether you would like to continue with the procedure by pressing the Enterkey, in which case the Printer will reboot. Press Back or Cancel to exit the
procedure at this point.
4. If the Ink Cartridges contain between 88% to 100 % of ink the following message will appear on the Front Panel. Replace the installed Ink Cartridges with Ink Cartridges that are new or contain less than 88% of ink. Press any key to finish the utility.

5. Once the Printer has rebooted, the Front Panel will instruct you to open the Window and remove ALL the Printheads installed in the Carriage.

6. Once ALL the Printheads have been removed, the Front Panel will instruct you to install the Setup Printheads into the Carriage. Make sure you install the Setup Printheads in stalls 1, 3, 5 and 7.

7. Once all the Setup Printheads are installed, the following message will appear on the front panel. Close the carriage cover and close the window.

8. The printer will begin to purge the tubes system.
9. Once the tubes system has been purged, the following message will instruct you to open the Window:

10. When the following message appears on the Front Panel, open the Carriage cover and check the window on top of each Setup Printhead. If the Ink Supply Tubes have been primed correctly, the windows will contain ink. If the windows on top of each Setup Printhead does NOT contain ink, then you may need to repeat the Prime Tubes process from the beginning.

11. Remove ALL the Setup Printheads from the Carriage and install the previously removed Printheads.
12. Once ALL the Printheads are installed, the Front Panel will instruct you to close the Carriage cover and close the Window.

13. Open the right cover and make sure the Printhead Cleaners are installed in the Service Station.

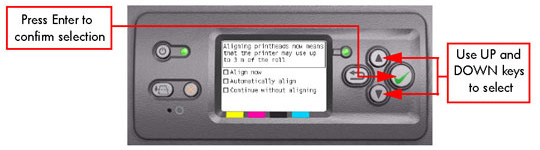
14. The Printer will now perform the Printhead Alignment and the following message will be displayed on the Front Panel. To continue with the Printhead Alignment, select "Align now" and press the Enter key.
15. Once the Printhead Alignment is completed, the following message will be displayed on the Front Panel. Press the Enter key to continue.
 |
||||||||||||||||||||||||||||||
|
|||||||||||||||||||||||||||||||