|
|
|
||||||||||||||||||||||||||||||
|
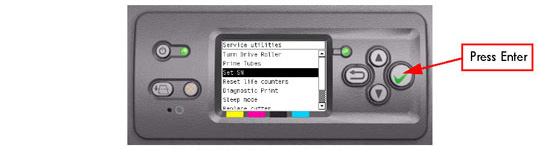
Set SN
The purpose of this Service Utility is to set the Serial Number of the Printer.
Perform the Set SN utility as follows:
1. In the Service Utilities submenu, scroll to "Set SN" and press Enter.
2. The Printer will display the current Serial Number and the new Serial Number of the Printer. Use the Up and Down keys to go through the digits and press the Enter key to go to the next digit. You can press the Cancel key at any time to exit the utility without making any changes.
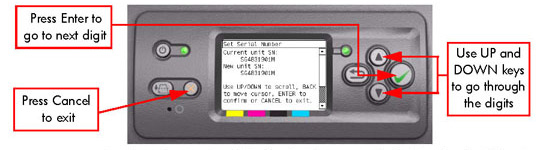 If the Serial Number or the Part Number cannot be read, the Front Panel will display System Error Code 74:00.
3. Once the new Serial Number has been entered, the Front Panel will display
the Serial Number and Model Number of the Printer. Press the Enter key to
confirm the Serial Number or the Cancel key to exit the utility without
making any changes or the Back key to modify again.
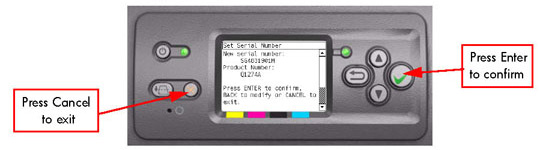
4. If the new Serial Number cannot be set, the Front Panel will display System Error Code 74:00.
5. If the utility exits correctly, OK will be displayed on the Front Panel.
|
||||||||||||||||||||||||||||||
|
|||||||||||||||||||||||||||||||