select printer | 4000 series | troubleshooting | general troubleshooting
hp designjet 4000 series printers
» general troubleshooting
» send feedback or
comments
 

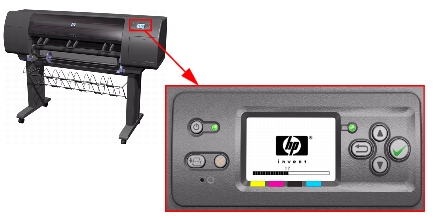
Using the Power-up Sequence to Troubleshoot

When the Printer is powered up, it performs the Boot-UP sequence which initializes the major components of the Printer. If for some reason the Boot-Up sequence fails because a components has failed to initialize, the following explanations will help you to locate the failing component:

Step
Initialization Process
BULNEX KERNEL BOOT
30
rc.sysinit rerun through initlog.
29
» Environmental variables PATH, NETWORKING, HOSTNAME set.
» Source /etc/init.d functions.
28
» Fix console loglevel.
» Mount /proc.
» Dismount the initrd, if necessary.
» Configure kernel parameters.
27
Set the system clock.
26
Load keymap.
25
Load system font.
24
Start up swapping.
23
» Set the hostname.
» Initialize USB controller and HID devices
22
» Set variables for options to be later used for filesystem check
» Turn Off DMA on CD-ROMs
» Turn On Hard Disk optimization
21
Perform file system check on root volume.
20
Update quotas if fsck was run on root
19
Setup pnp
18
» Remount the root filesystem read-write.
» LVM initialization.
» Clear mtab.
» Enter root, /proc and (potentially /proc/bus/usb and devfs into mtab.
» Remove /lib/modules/preferred and /lib/modules/default.
» Tweak isapnp settings if needed.
» Load sound modules if the need persistent DMA buffers.
17
» Load modules from /etc/rc.modules.
» File system check.
» Add raid devices.
16
» Setup Logical Volume Management.
» Check filesystems on all volumes found on /etc/fstab.
15
Mount local filesystems.
14
Check remaining quotas other than root.
13
Enable local filesystem quotas.
12
» Configure machine if necessary (if the respective configure files exist).
» Reread in network configuration data.
11
» Clean out /etc, (w/u)tmpx files, /var.
» Reset pam_console permissions.
» Cleanup utmp/wtmp.
» Delete X locks.
» Delete VNC and X locks.
» Delete Postgres sockets.
» Turn On swap in case we swap to files.
10
» Initialize the Serial Ports.
» If a SCSI tape has been detected, load the st module unconditionally.
» Load usb storage to match most other things.
» If ide-scsi is required, load it.
» Generate a header that defines the boot kernel.
9
» Dump the syslog ring in /var/log/dmesg.
» Keep kernel symbols in /var/log/ksyms.
» Create the crash indicator flag to warn on crashes, offer fsck with timeout.
8
Export this variable BOOT_PART and INSTALL_PART.
PRINT APPLICATION STARTING POINT
7
IO kernel mode initialization (basically).
6
Printer Application Infrastructure startup.
5
Printer IO startup.
4
Front Panel application startup (but wait for engine launching, i.e. Front Panel is not cleared yet).
3
Engine startup, start EE and Mechanical initialization.
2
HPGL/PS parsers startup.
1
All subsystems launched.
Wait for Front Panel application to clear the Front Panel and start signaling the initialization sequence.

Corrective Actions for Power-Up Problems

1. If the Printer's Power-Up process stops when the front panel is displaying the number 17, this indicates that there is a problem with the file system on the Printer's Hard Disk Drive, so the Printer is checking the whole file system and making any necessary corrections. This problem can arise when there has been a power cut while the Printer was switched On, or if there is a physical problem with the Hard Disk Drive.
Checking the whole file system normally takes about half an hour (but could take much longer). There is nothing that can be done to speed up the file checking process. If you turn Off the Printer during the checking process, the file system check will restart whenever you turn it On again.
If you experience this problem repeatedly when there has been no power cut, then this could mean that the Hard Disk Drive is faulty. In this case, replace the Hard Disk Drive.
2. If the printer's start-up process stops when the front panel is displaying any number between 1 to 30, then try the following:
  • Switch the Power OFF from the back of the Printer and disconnect the Power cord. Reconnect the power cord and power On the Printer.
  • If the Printer continues to stop during the power-up process, replace the Hard Disk Drive.
© 1994-2006 Hewlett-Packard Company