|
|
paper-axis motor drive assembly |
|
| |
|
|
 |
|
Switch off the product and remove the power
cable. |
|
| |
|
|
| |
|
1. Remove the front
cover |
| |
|
|
| |
|
2. Remove the left
end cover |
| |
|
|
 |
|
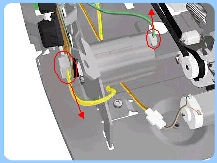
3. Disconnect the Paper-Axis and
Encoder cables. |
| |
|
|
 |
|
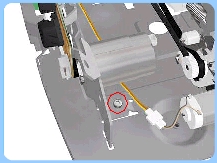
4. Remove 1 T-10 screw that secures
the Paper-Axis Motor Mount. |
| |
|
|
 |
|
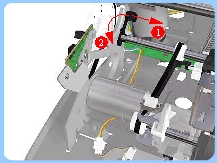
5. Release the locking mechanism
that secures the Paper-Axis Motor Mount. |
| |
|
|
 |
|
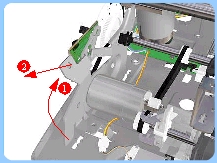
6. Remove the Paper-Axis Motor Assembly
from the Printer. |
| |
|
|
|
|
|
After removing or replacing the Paper-Axis Motor Assembly, make sure
that you
perform the Accuracy Calibration. |
| |
|
|