|
|
pinch assembly |
|
| |
|
|
 |
|
Switch off the product and remove the power
cable. |
|
| |
|
|
| |
|
1. Remove the center
cover |
| |
|
|
| |
|
2. Remove the cleanout
assembly |
| |
|
|
| |
|
3. Remove the pick
assembly |
| |
|
|
 |
|
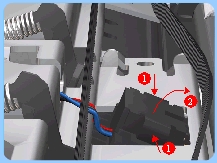
4. Release the Out-of-Paper Sensor
from the Pinch Assembly by pinching the tabs on either side.
|
| |
|
|
| |
 |
|
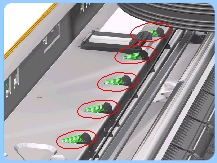
5. Release ALL the Pinch Springs from
the Pinch Assembly. |
|
| |
|
|
 |
|
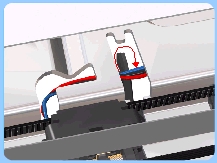
6. Release the Out-of-Paper Sensor
cable that is looped underneath the Pinch
Assembly. |
| |
|
|
 |
|
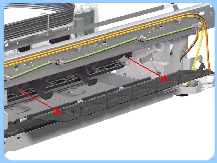
7. Working from the rear, pull out
the Pinch Assembly from the Printer.
|
| |
|
|
| After removing or
replacing the Pinch Assembly, make sure that you perform the PRS Adjustment
procedure. |
| |
|
|