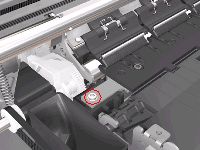
5. Remove 1 T-8
screw and washer that secure the Pivot Assembly on the left hand side
of the Printer.
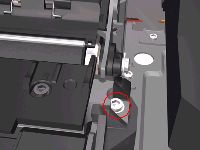
6. Remove 1 T-8
screw and washer that secure the Pivot Assembly on the right hand
side of the Printer.
7. Remove the Pivot
Assembly from the Printer.
After removing or replacing the Pivot Assembly,
make sure that you perform the PRS Adjustment procedure.
Make sure you use NEW screws to install the Pivot Assembly when
it has been removed or replaced.