| |
|
||||||||||||||||||||||||||||||
|
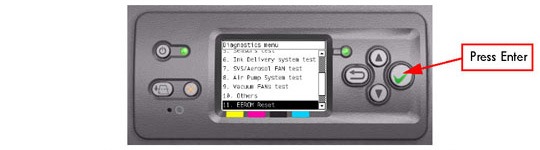
11. EEROM Reset
The purpose of this diagnostic is to reset the EEROM values.
Once the EEROM has been reset, the Printer will act as if it is
being started for the first time, except that the Ink Supply
Tubes have already been primed.
Perform an EEROM Reset as follows:
1. In the Service Tests submenu, scroll to "11. EEROM Reset" and press Enter.
2. A message will appear on the Front Panel advising you that all user information/files will be removed. If you would like to proceed select Yes or No by using the Up and Down keys and press Enter to confirm your selection.
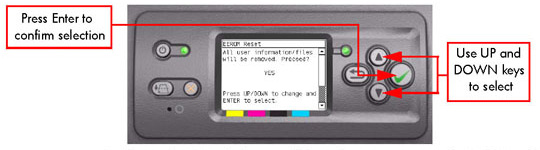
If you select No, the process will end at this point.
3. If you select Yes, the Printer will begin the process to reset the EEROM and the following messages will appear on the Front Panel:
If there is a failure at this point, the Front Panel will display System Error Code 01.0:10.
If there is a failure at this point, the Front Panel will display System Error Code 79:03.
4. Once the EEROM has been reset, the following message will appear on the Front Panel.

Press any key to continue.
After rebooting the Printer, make sure you select Printhead replacement through the Front Panel in order to launch the Printhead calibration.
5. Once the process is completed, OK will be displayed on the Front Panel.
 |
||||||||||||||||||||||||||||||
|
|||||||||||||||||||||||||||||||