| |
|
||||||||||||||||||||||||||||||
|
14. I/O Tests
The purpose of this test is to check the installed and active I/O Interfaces.
Perform the I/O tests as follows:
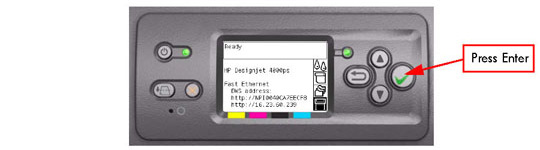
1. Once the message "Ready" is displayed on the front-panel, scroll to the "Printer Setup Options" icon and press the Enter key.
2. Once inside the "Printer Setup Menus" menu, press the UP or Down arrow key and the Cancel key together. You are now in the Service Tools Menu.
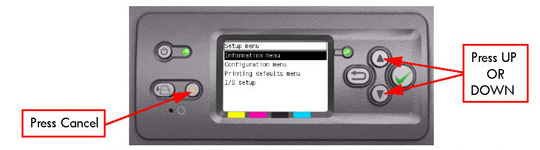
3. Use the Arrow keys to scroll to the "Service Tests" menu and press the Enter key.

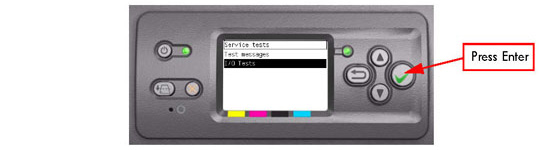
4. In the Service Tests submenu, scroll to "I/O Tests" and press Enter.
5. When the following message appears on the front panel, you must select
whether you would like to continue with the test by pressing the Enter key. Press Back or Cancel to exit the calibration. 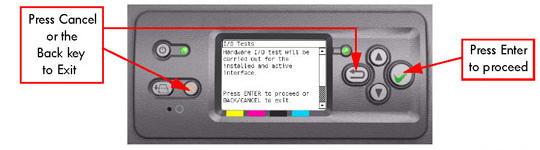
6. The Printer will get information on the I/O Interfaces. Once the information
has been read, the following message will be displayed on the Front Panel.
Press any key to continue with the test:

This screens shows which interface is currently installed and active. If a connection is made to the active interface, the "Active int. MAC state" will be displayed as UP, otherwise it will displayed as DOWN.
7. If an active interface is installed, the Printer will test the active interface and if
it passes it will display the following message on the Front Panel:

8. Once the process is completed, OK will be displayed on the Front Panel.
|
||||||||||||||||||||||||||||||
|
|||||||||||||||||||||||||||||||