| |
|
 |
|
|
| |
1. Remove
the Center Cover |
| |
|
| |
|
2. Remove the Right
End Cover |
| |
|
|
| |
|
3. Remove the Left
End Cover |
| |
|
|
| |
|
4. Remove
the Starwheel Assembly |
| |
|
|
 |
|
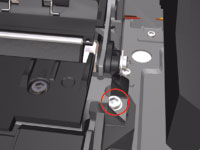
5. Remove 1 T-8
screw and washer that secure the Pivot Assembly on the left hand side
of the Printer. |
| |
|
|
 |
|
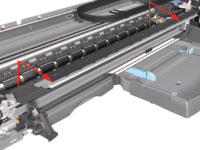
6. Remove 1 T-8
screw and washer that secure the Pivot Assembly on the right hand
side of the Printer. |
| |
|
|
 |
|
7. Remove the Pivot
Assembly from the Printer. |
| |
|
|