select printer | 90/120/130 series disassembly | disassembly instructions
hp designjet 90/120 and 130 series printers
» disassembly instructions
 
» disassembly instructions
» right end cover
» left end cover
» ink supply station
» electronics module
» power supply unit
» service station
» front panel
» encoder strip
» carriage motor
» cleanout assembly
» ink supply tubes
» carriage (120/120nr)
» carriage (90/90r/ 130/130nr)
» carriage belt
» starwheel assembly
» print platen assembly
» ramp motor assembly
» spittoon
» pivot assembly
» feed roller assembly
» pick assembly
» inner paper guide
» OOPS sensor
» paper-axis motor
» bypass platen
» bypass platen actuator (90/90r/130/130nr)
» send feedback or
comments
 
ink supply station
Switch off the product and remove the power cable.
   
  1. Remove the Center Cover
   
  2. Remove the Right End Cover
   
3. Release the Plastic Cover protecting the Electronics Module.
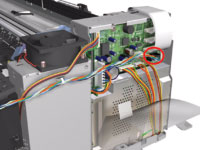
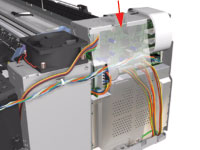
   
4. Disconnect the Ink Supply Station Cable from the Main PCA.
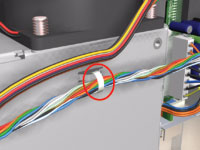
   
5. Cut the plastic Tie that secures the Ink Supply Station Cable to the Power Supply Unit.
   
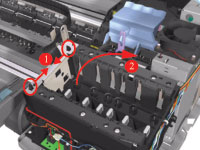
6. Release the Tubes Bracket from the Ink Supply Station by pushing the clips inwards and lifting up the Bracket.
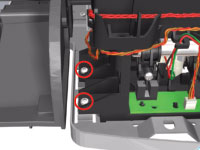
   
7. Remove 2 T-10 screws that secure the Ink Supply Station.
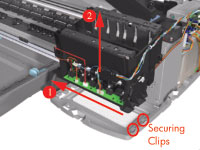
   
8. Move the Ink Supply Station to the left to release it from the securing clips and the upwards out of the printer.
   

© 1994-2006 Hewlett-Packard Company