| |
|
 |
|
|
| |
1. Remove
the Center Cover |
| |
|
| |
2. Remove the Right
End Cover |
| |
|
|
| |
|
3. Remove the
Electronics Module |
| |
|
|
| |
|
4. Remove the Power
Supply Unit |
| |
|
|
| |
|
5. Remove the Service
Station |
| |
|
|
 |
|
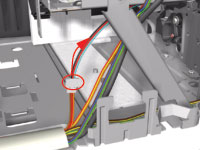
6. Disconnect the
OOPS Sensor Cable. |
| |
|
|
 |
|
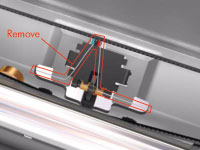
7. Remove the Spring
that secures the OOPS Sensor. |
| |
|
|
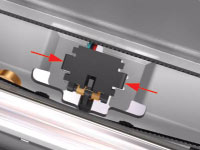 |
8. Press the OOPS
Sensor clips inwards to release it. |
| |
|
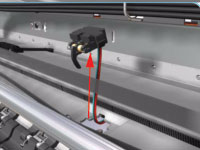 |
9. Remove the OOPS
Sensor (including the cable) from the Printer. |
| |
|