| |
|
 |
|
|
| |
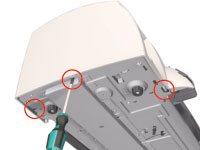
1. Remove
the Center Cover |
| |
|
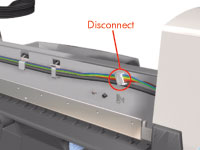 |
2. Disconnect the
Front Panel cable from the rear of the Printer.
|
| |
|
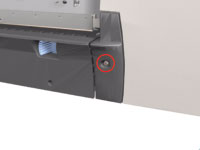 |
3. Remove 1 T-10
screw from the Rear Left Trim. |
| |
|
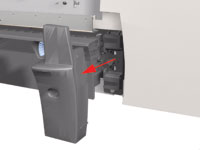 |
4. Remove the Rear
Left Trim from the Printer. |
| |
|
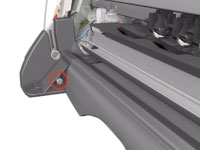 |
5. Remove 1 T-10
screw from the Left Side Bracket. |
| |
|
 |
6. Release the clips
that secure the Left End Cover to the Printer (use a flat-blade screwdriver
if necessary).
|
| |
|
 |
7. Remove the Left
End Cover from the Printer. |
| |
|
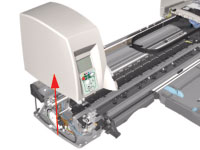
Before installing the Left End Cover, make sure you first
check that the Front Panel Cable is routed correctly as shown
on Front
Panel. |
|
| |
| |
|