|
|
|
 |
|
|
| 1. Remove the Cleanout Assembly |
| |
| 2. Remove the Top Cover |
| |
| 3. Remove the Center Cover |
| |
| 4. Remove the Right End Cover |
| |
| 5. Remove the Left End Cover |
| |
| 6. Remove the Electronics Module |
| |
| 7. Remove the Power Supply Unit |
| |
| 8. Remove the Service Station |
| |
| 9. Remove the Encoder Strip |
| |
| 10. Remove the Ink Supply tubes |
| |
| 11. Remove the Carriage Assembly |
| |
| 12. Remove the Starwheel Assembly |
| |
| 13. Remove the Print Platen Assembly |
| |
| 14. Remove the Pivot Assembly |
| |
| 15. Remove the Feed Roller Assembly |
| |
| 16. Remove the Pick Assembly |
| |
| 17. Remove the Inner Paper Guide |
| |
 |
|
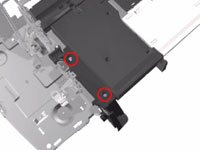
18. Remove 2 T-10 screws that secure the Left
Bracket to the Chassis. |
| |
|
|
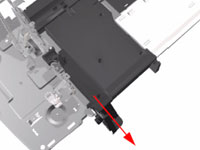 |
19. Slide the Left Bracket out of the Printer. |
| |
|
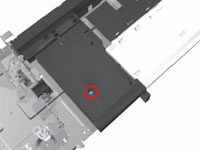 |
20.Remove 1 T-10 screw that secures the Side Guide to the Chassis. |
| |
|
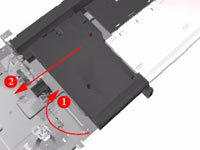 |
21. Raise the Side Guide and then slide it out to the left. |
| |
|
 |
|
22. Slide the Bypass Platen to the left and
remove from the Printer. |
| |