select printer
|
4000 series
|
disassembly
|
disassembly instructions
hp designjet 4000 series printers
1000/1000 plus series
500/800 series
5000/5500 series
multi-roll feeder
10ps/20ps/30/30n/50ps
scanner series
70/100/100plus/110plus
90/120/130 series
4000 series printers
4500 series printers
9000s series printers
10000s series printers
Z2100/Z3100 series
8000s series printers
»
disassembly instructions
»
Introduction
»
Screw Types
»
Window
»
Right Cover
»
Left Cover
»
Top Cover
»
Rear Door
»
Right Connector Cover
»
Left Connector Cover
»
Front Panel
»
Service Station
»
Vacuum Fan
»
Aerosol Fan
»
Drop Detector
»
Ink Supply Tubes and Trailing Cable
»
ISS to Cartridge Cables
»
Cutter Assembly
»
Ink Supply Station
»
APS Assembly
»
Most Left Spittoons
»
Middle Left Spittoons
»
Encoder Strip and Encoder Sensor
»
Carriage PCA
»
Carriage Flex Cables
»
Carriage Assembly
»
Belt Assembly
»
Scan-Axis Motor
»
Media-Axis Motor
»
Interconnect PCA
»
EIO to PCA Interface Card
»
Gamut PCI PCA
»
Memory Module
»
Main PCA Formatter
»
Hard Disk Drive
»
Power Supply Unit
»
PrintMech PCA
»
Formatter Battery
»
Line Sensor
»
Media Deflector
»
Front Platen
»
Center Platen
»
Cartridge Trays
»
Input Roller
»
Push-Push
»
Media Sensor
»
Encoder Disc and Sensor
»
Media Lever
»
Media Lever Sensor
»
Pinchwheel Assembly
»
Center Guide
»
Drive Roller
»
Right Rollfeed Module Assembly
»
Right Spindle Lever
»
send feedback or
comments
Scan-Axis Motor
Removal
Switch off the product and remove the power cable.
1.
Remove the
Right Cover
.
2.
Remove the
Left Cover
.
3.
Remove the
Rear Door
.
4.
Remove the
Left Connector Cover
5.
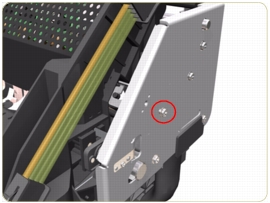
Remove one T-15 screw that secures the Belt Tensioner to the Chassis.
6.
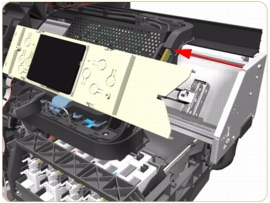
Move the Carriage Assembly slightly away from the right Scan-Axis Bracket.
7.
Release the Carriage Belt from the Scan-Axis Motor on the left hand side of the Printer.
8.
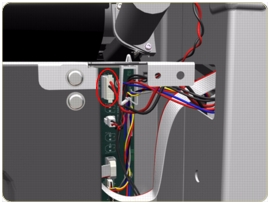
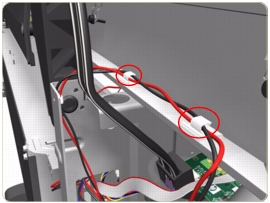
Disconnect the Scan-Axis Motor cable from the PrintMech PCA.
9.
Release the Scan-Axis Motor cable from the clips on the chassis.
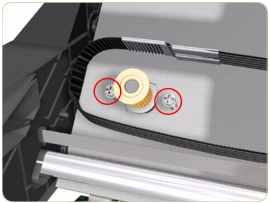
10.
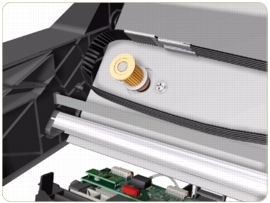
Remove two T-20 screws (
Type A
) that secure the Scan-Axis Motor.
Make sure you hold the Scan-Axis Motor securely when removing the screws.
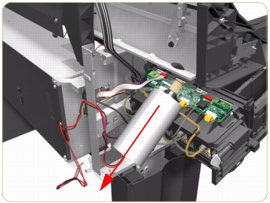
11.
Remove the Scan-Axis Motor from the Printer.
After installing the NEW Scan-Axis Motor, make sure you perform the following Service Utility:
Reset life counter scan motor
.
privacy statement
using this site means you accept its terms
© 1994-2006 Hewlett-Packard Company