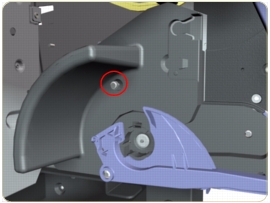
6. Remove one T-15 screw (Type B) that secures the Right Rollfeed Module from the inside.
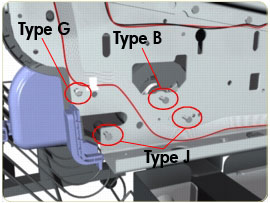
7. Remove one T-20 screws (Type B), one T-15 screw (Type G) and two T-15 screws (Type J) that secure the Right Rollfeed Module from the outside.
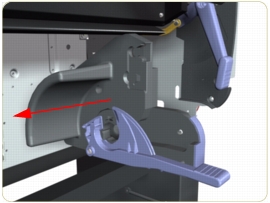
8. Remove the Right Rollfeed Module from the Printer.
Installation
Follow these instructions for the correct installation of a NEW Right Rollfeed Module Assembly:
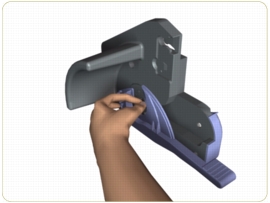
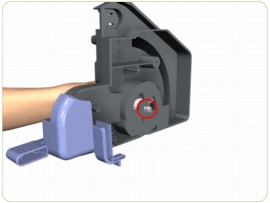
1. Hold the Right Rollfeed Module as shown, keeping your thumb firmly on the Media Tension Mechanism.
2. While securely holding the Right Rollfeed Module, remove the T-15 screw that secures the Media Tension Mechanism.
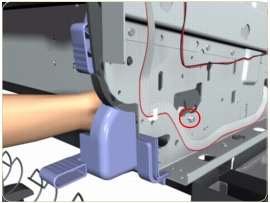
3. While securely holding the Right Rollfeed Module, position the Right Rollfeed on to the Printer and install the T-15 screw that was removed in the previous step.
4. Install the remaining screws that were removed during the removal process.