|
| |
|
|
|
1.
Only applicable to the DesignJet 5000 Series - Remove
the Deflector closest to the Right Cover See Deflectors. |
| |
|
|
|
| |
|
|
2. Remove
the Right Hand Cover |
| |
|
|
|
| |
 |
|
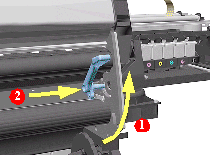
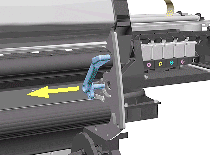
3. Raise
the Media Lever. |
| |
|
|
|
| |
 |
|
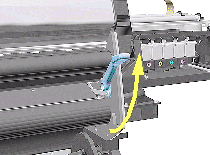
4. Remove
1 T-15 screw (Type D) from the support that attaches the Media Lever
to the Sideplate.
|
| |
|
|
|
| |
 |
|
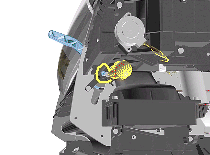
5. Remove
1 T-15 screw (Type H) that attaches the Lever Arm to the Lever.
|
| |
|
|
|
| |
 |
|
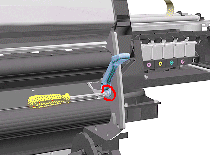
6. Remove
the Media Lever. |
| |
|
|
|