center Platen Assembly
WARNING: Switch off the Printer and remove the Power Cord.
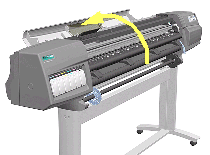
1. Open the Top Cover.
NOTE: Make sure the Carriage is not in the print Platen area.
NOTE: Make sure the Media Lever is in the UP position (to raise the pinch-wheels) before removing the Platen Assembly.
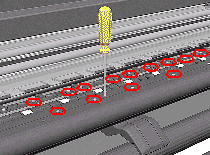
2. Remove the following screws (Type R) from the Center Platen Assembly:
-39 T-10 screws in the 60" Model. -35 T-10 screws in the 42" Model.
NOTE: Be very careful when removing the screws because they can easily get damaged.
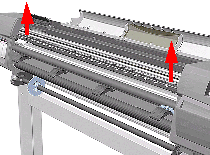
3. Remove the complete Center Platen Assembly (includes the Overdrive Assembly and the Cutter guide).
NOTE: You must perform the following Calibrations when the Center Platen Assembly is replaced:
-Scan-Axis Calibration -Carriage Height Calibration
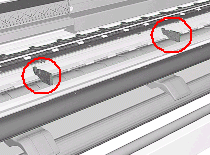
Installation of the Center Platen Assembly
NOTE: When installing the Center Platen Assembly, make sure the foam guides under the Platen are placed in their slots as shown below.