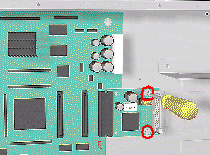
6. Remove
2 T-10 screws that secure the PCI-to-IDE PCA.
7. Disconnect
the PCI-to-IDE PCA and
remove from the Printer.
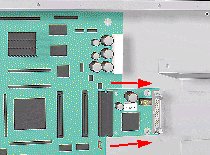
Installation of the
PCI-to-IDE PCA
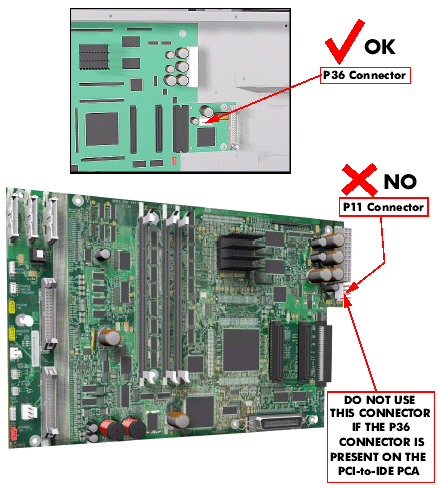
NOTE: When installing the new PCI-to-IDE PCA, CONNECT THE HDD
POWER CABLE TO THE P36 CONNECTOR (IF PRESENT) ON THE PCI-TO-IDE
PCA AND NOT TO THE P11 CONNECTOR ON THE MAIN PCA (even if the P11
connector is present and the HDD Power Cable was connected there
previously).
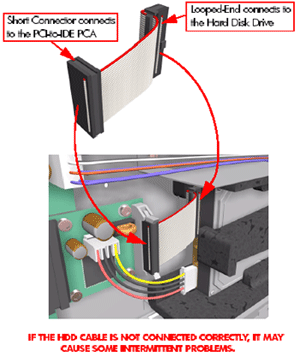
Installing the HDD Cable
When installing the HDD Cable between the HDD and the PCI-to-IDE
PCA, make sure you connect the correct ends as follows: