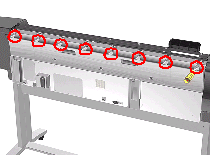
2.
Remove the following (Type B) screws from the upper part of the Back
Cover:
-8 Screws (T-15) for the 60" Model.
-6 Screws (T-15) for the 42" Model.
NOTE: Support the
Back Cover as it is released.
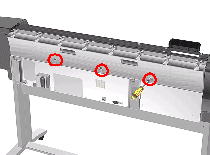
3. Remove
3 T-15 screws (Type N) from the lower part of the Back Cover.
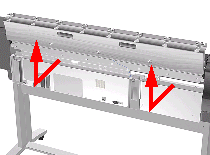
4. Remove
the Back Cover.
Installation of the
Back Cover
NOTE: If the Back Cover is replaced, remember to apply a new Printer
Label to the new Back Cover before it is installed. Once the new
label has been applied, copy the product number and serial number
onto it.