|
| |
|
|
|
1.
Remove the Left Hand Cover |
| |
|
|
|
| |
|
|
2. Remove
the Right Hand Cover |
| |
|
|
|
| |
|
|
3. Remove
the Top Cover Assembly |
| |
|
|
|
| |
|
|
4. Remove
the Back Cover |
| |
|
|
|
| |
|
|
5. Remove
the EMC Covers |
| |
|
|
|
| |
 |
|
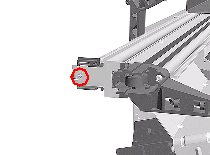
6. Remove
the 5.5 mm nut from the left hand side of the Printer that attaches
the Encoder Strip to the Spring Clip. |
| |
|
|
|
|
| |
|
 |
|
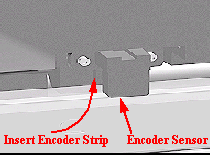
7.
Release the Encoder strip from the Spring Clip. |
| |
|
|
|
| |
 |
|
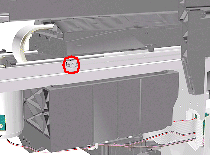
8. Remove
the 5.5 mm nut from the right hand side of the Printer. |
| |
|
|
|
| |
 |
|
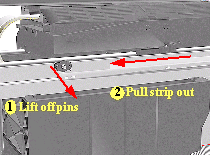
9. Remove
the Encoder Strip from the Printer. |
| |
|
|
|