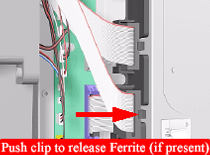
4. If
present, remove the Ferrites from the Ferrite Holder on the right
side.
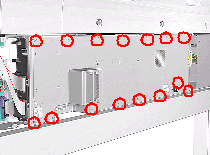
5. Remove
15 T-15 screws (Type B) from the Electronics Module Cover.
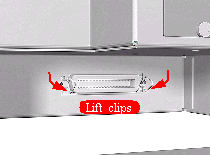
NOTE: Lift the Parallel
Port Clips before removing the Cover.
6. Remove
the Electronics Module Cover.
Installation of the
Electronics Module Cover
NOTE: When Installing the Electronics Module Cover make sure the
parallel port connector clips are in closed position i.e. UP, so
that they pass through the slot in the Cover.