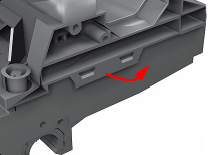
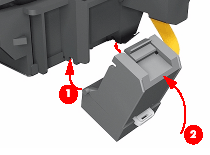
2. Unclip
the Carriage Cover from both sides of the Carriage Assembly.
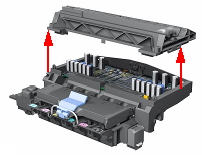
3.
Remove the Carriage Cover.
NOTE: Make sure both
sides of the cover are unclipped before removing. Also make sure
the cover is removed vertically, if not the Cover Retaining Pins
can be broken.
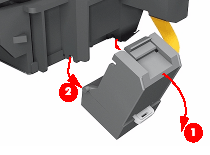
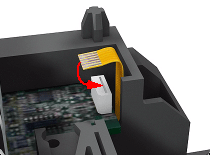
4.
Disconnect the Line Sensor Connector
from the Carriage PCA.
5. Insert
a flat screwdriver inside the Line Sensor clip in order to release
it.
6.
Once the clip is released, rotate the Line Sensor downwards so that
the locating pins on both sides are also released.
Installation
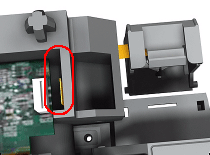
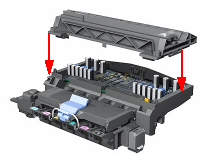
1.
When installing the new Line Sensor, make sure you insert the Line
Sensor Cable through the correct hole (as
highlighted).
2. Install
the Line Sensor by first inserting the 2 locating pins and then rotating
upwards so that the clip locks into place.
NOTE: Make sure the
Line Sensor is clipped correctly and securely, if not the Line Sensor
will malfunction.
3.
Connect the Line Sensor Connector to the Carriage PCA.
4. Install
the Carriage Cover.
NOTE Make sure the
cover is installed vertically, if not the Cover Retaining Pins can
be broken.
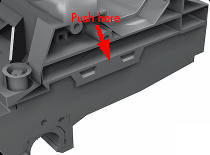
5.
Clip the Carriage Cover on both sides of the Carriage Assembly by
pushing the clip downwards (with force if necessary).
NOTE: Make sure the
clips are locked correctly, if not the Carriage Cover could become
loose and cause major damage to the printer.
NOTE: You must perform
the following Calibration when the Line Sensor is replaced: