|
| |
|
|
|
1.
Remove Right Rear Cover. |
| |
|
|
|
| |
|
|
2. Remove
the Right Hand Cover. |
| |
|
|
|
| |
|
|
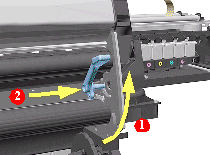
3. Remove
the Media Lever. |
| |
|
|
|
| |
 |
|
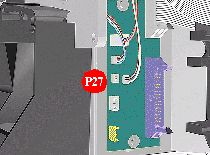
4. Disconnect
the Sensors cable from position P27 on the Main PCA.
|
| |
|
|
|
| |
 |
|
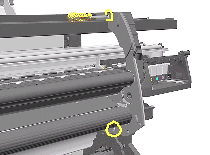
5. Remove
1 T-15 screws (Type F) and 1 T-20 (Type L) from the Right Hand Trim.
|
| |
|
|
|
| |
 |
|
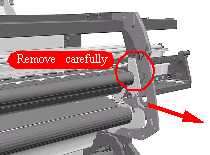
6. Carefully
remove the Right Hand Trim. |
| |
|
|
|